Let’s jump right into the fascinating world of GIB installation, beginning with one of the most essential elements – screwing into GIB. As a resident of Auckland, it’s beneficial to comprehend this process, whether you plan on doing it yourself or hiring a professional.
Equipment for Screw Installation in GIB
Starting on the right foot is crucial. Here’s a list of necessary tools:
- Screwdriver or power drill
- GIB screws
- GIB board
- Screw gun attachment
- Spirit level
- Pencil or marker
Choosing the Right Screw for GIB
The key to a successful GIB installation lies in the choice of screws. In New Zealand, standard GIB screws are usually black or grey. The length can vary from 25mm to 50mm, depending on the GIB board’s thickness and the wall framing’s depth. Generally, for 10mm GIB board, a 32mm screw is ideal, while for 13mm board, a 40mm screw is typically recommended.
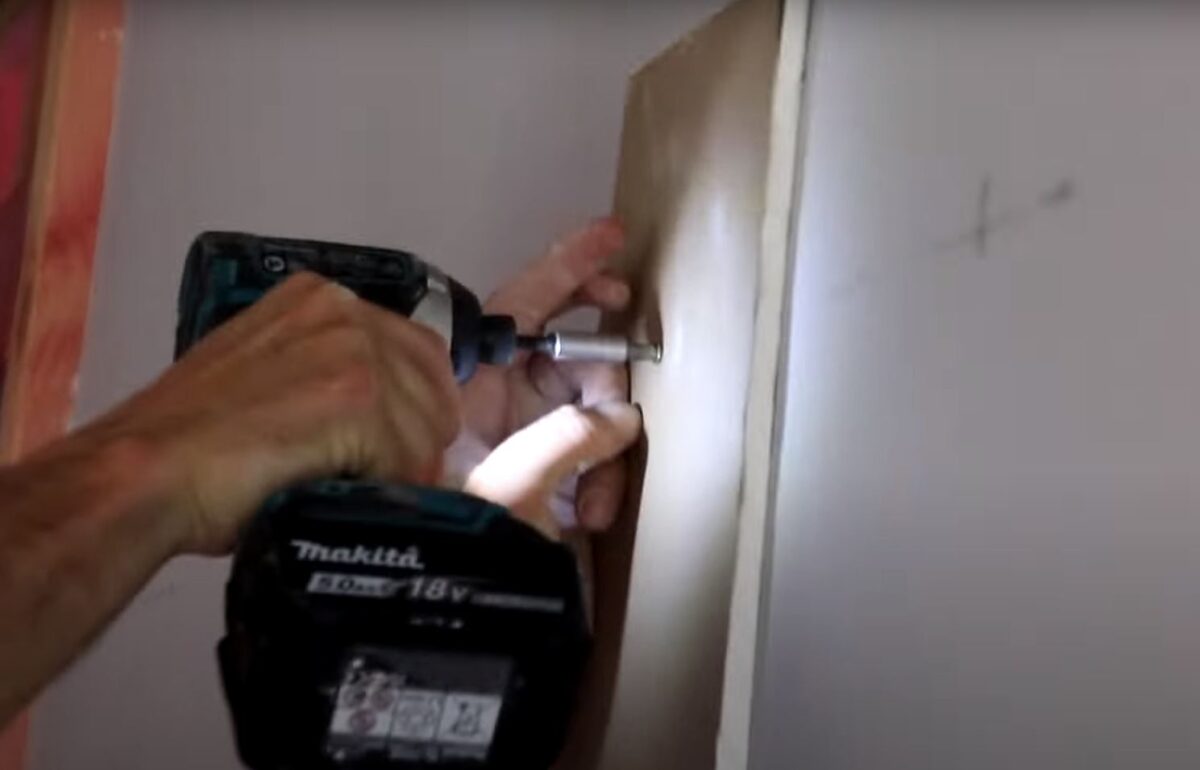
Steps to Screw into GIB
The following process encapsulates how to screw into GIB:
- Mark the Stud Locations: Use a stud finder to locate the studs in the wall. Mark their positions with a pencil or marker.
- Align the GIB Board: Position the GIB board onto the stud line. Use a spirit level to ensure it’s vertically and horizontally aligned.
- Drill the Screws: Insert the screws at around 300mm intervals along the stud line. Ensure the screws are embedded just below the surface, without breaking the paper facing.
Health and Safety Measures for GIB Installation
The New Zealand WorkSafe authority stresses the importance of maintaining a safe environment while handling GIB installations. This involves:
- Ensuring a well-ventilated workspace to avoid inhaling GIB dust
- Using safety equipment such as gloves, safety glasses, and dust masks
- Avoiding overloading the ceiling with excessive weight
- Ensuring electrical safety if power tools are used
Auckland Council Bylaw Requirements
The Auckland Council’s Building Act 2004 states that a Building Consent is required for certain types of work, including structural wall alterations involving GIB installation. However, some repairs and maintenance work may be exempted. This could impact residents across Auckland, including Central Auckland, Rodney, Manukau, and North Shore, among others. Regional councils such as Waitakere and Franklin also have similar regulations. The specific Auckland Council District Plan codes addressing these requirements include H5.6.6, B2.2.1, and E1.6.2, among others.
Professional GIB Fixing in Auckland
While understanding the process of screwing into GIB is advantageous, a professional touch can guarantee a more secure and aesthetically pleasing result. Auckland boasts several skilled gib fixers who can guide you through the process and ensure compliance with Auckland Council bylaws and New Zealand WorkSafe regulations. Remember, high-quality GIB fixing contributes to the overall integrity and value of your Auckland home.
So, whether you are living in the heart of the city, on the outskirts in Rodney, or in the serene surroundings of North Shore, the process and regulations of screwing into GIB are essentially the same. Understanding these intricacies can help you engage with your gib fixer more effectively and ensure that your home renovation goes smoothly.